How we built a dance floor in one weekend on a shoestring budget
I feel like I should let you know up front that I am not crafty or handy by any means. As an example of my ineptitude, I have to call my teenage son to help me install my Amazon Firestick (I did it once, but I forgot what I did and have no patience for trying to remember when I could just use my Mom Voice to command authority and get a job done without actually doing it myself). My mind is not geared towards a design-plan-build mentality, so even though I have some passable ideas, they rarely make it to fruition. So when I have a problem, I usually need help to solve it.
One day, I was lamenting to my fiance that I really had nowhere for my girls to practice their dancing at home. And with the studios having been closed for months due to the coronavirus pandemic, their technique, stamina, and overall motivation were diminishing. Before my divorce, I lived in a fairly large house with a full, partially-finished basement where my girls would practice their acro. On top of that, I had a space in front of my walk-in closet that I had converted to a dance/workout area (complete with large mirror, portable ballet barre, and removable tap board).
Change of Venue
After the divorce, I downsized radically; gone were the days of the walk-in closet, never mind the annex attached to it. The basement in my new house, fairly sizable as it is, was crammed with boxes and belongings, leaving no available space to move (plus, the Clan of the Cave Cricket decided to take up residence down there, and I am a self-admitted coward when it comes to creepy crawlies). So what my family once had was no more, and I was feeling a bit sorry (for myself and for my girls) that I couldn’t provide them with a place to work on their skills.
Rather than allowing me to wallow in self-pity (which I’m pretty good at), Dave got right to work on the mental part of the process. He laid out his plan, which now seems simple and doable (but at the time, felt like it would take the moving of mountains).
The Plan
Step 1: Clear the basement as much as humanly possible. Throw away stuff I don’t use (gasp!) and organize the remaining boxes.
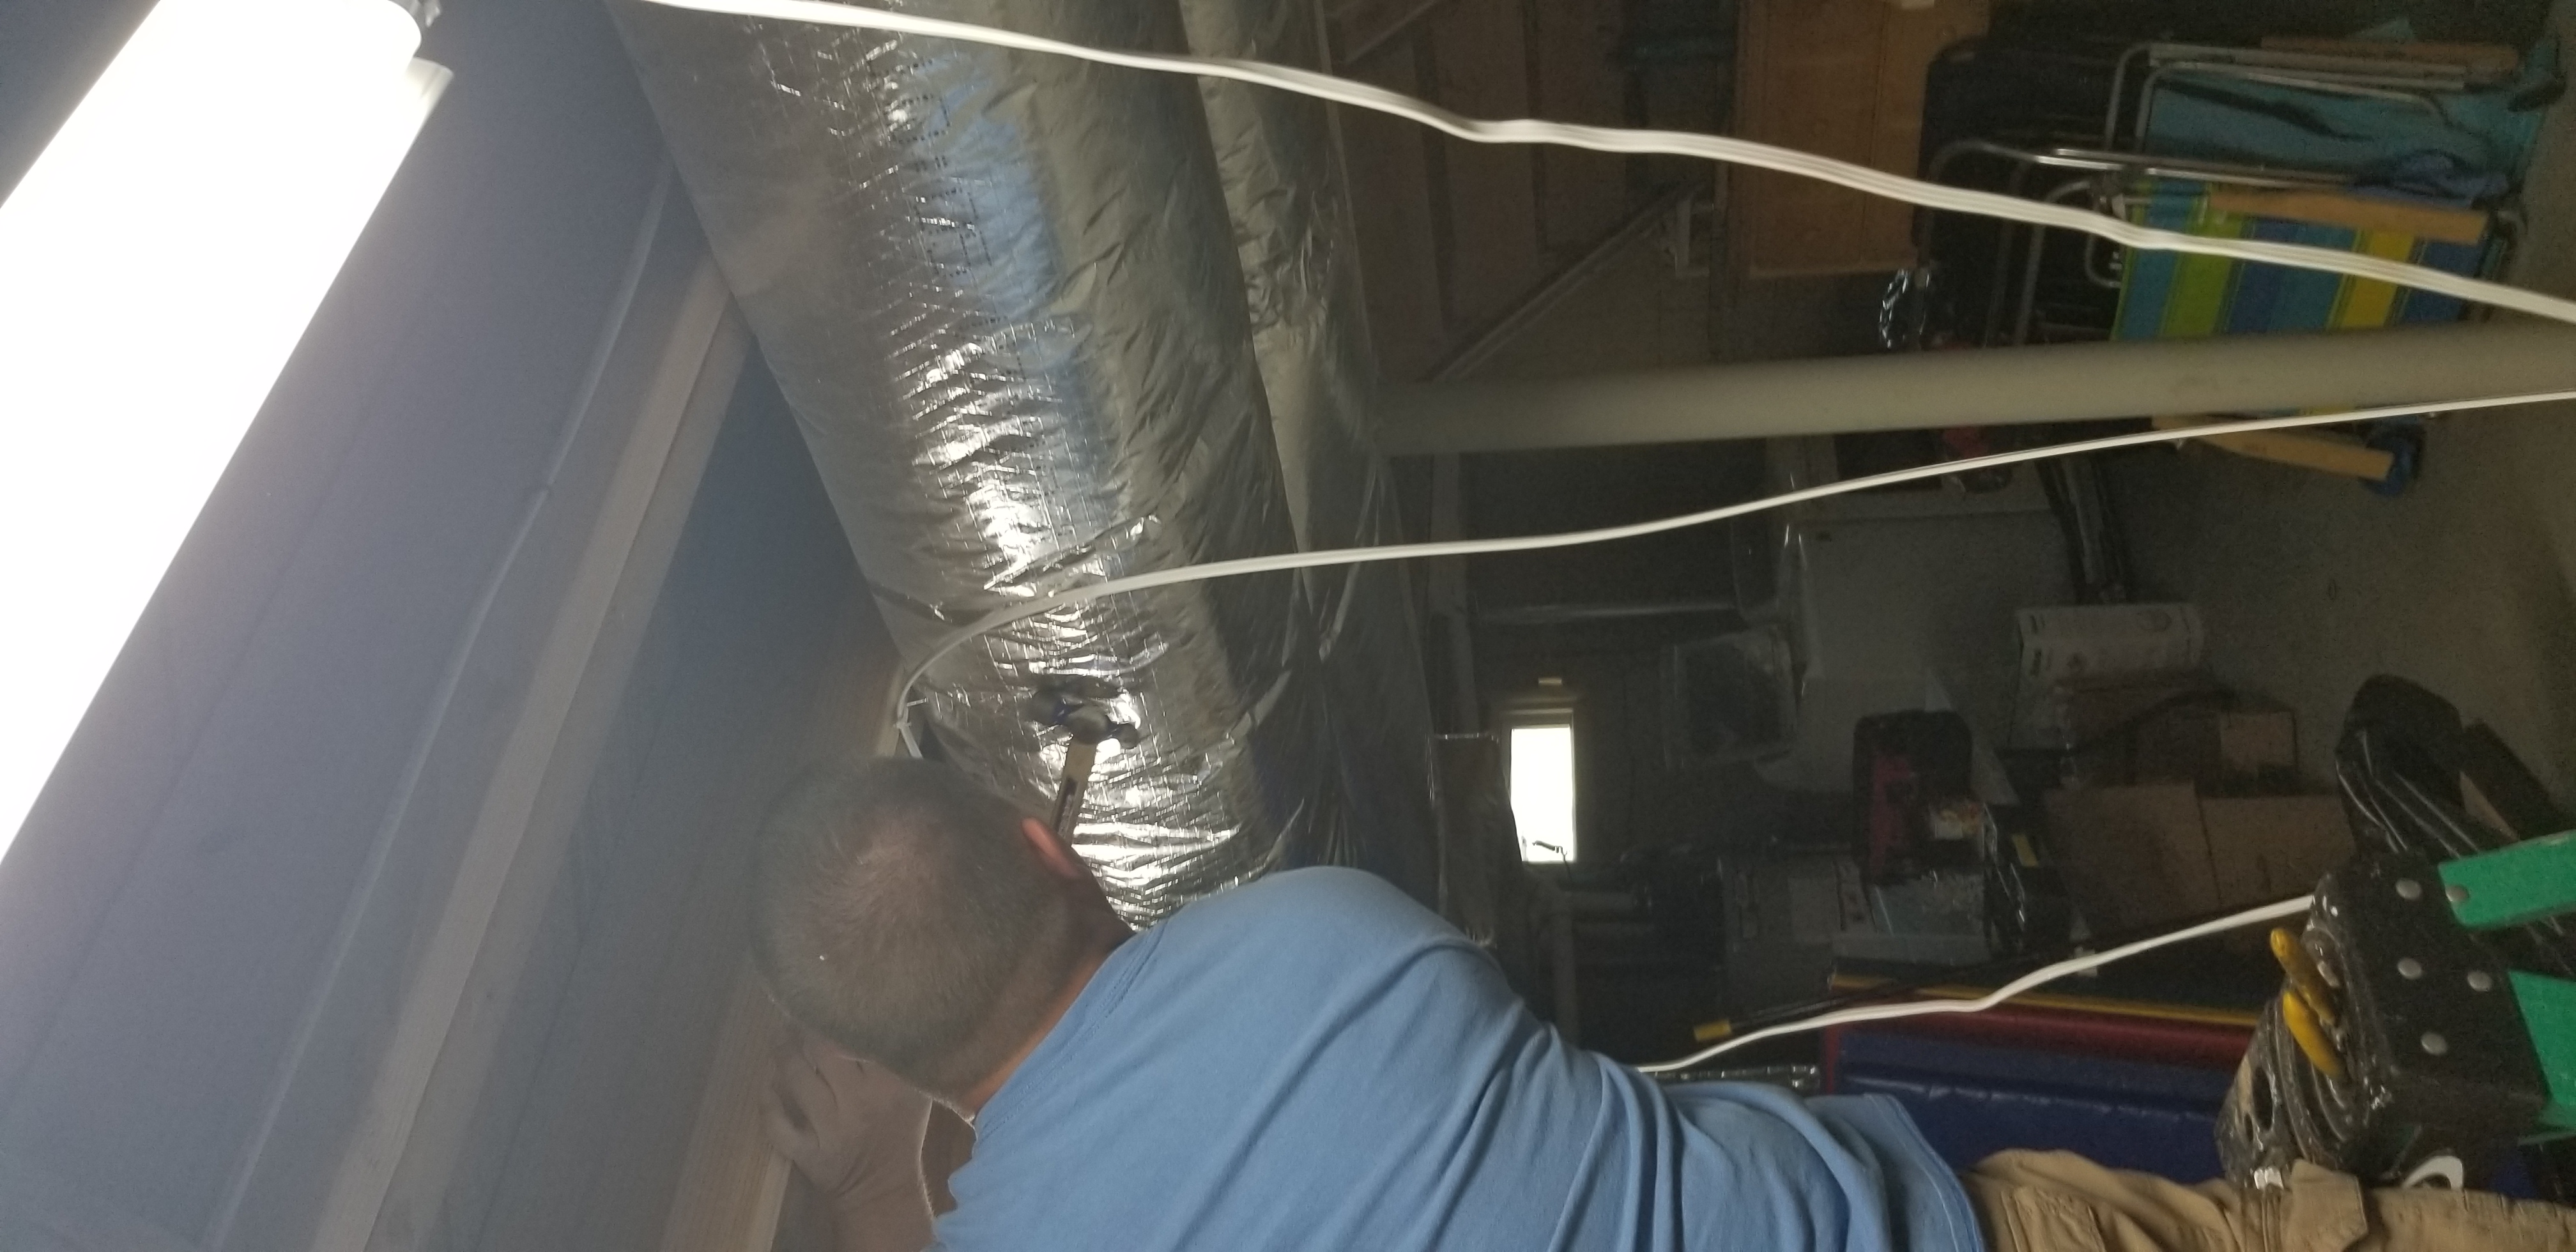
Step 2: Increase the lighting. Yeah, it was pretty dark. I felt like I was visiting a haunted house when I went down there to do the laundry.
Step 3: Vanquish the Clan of the Cave Crickets. The Supreme Leader would not be pleased…
Step 4: Install a dance floor on top of the cement. Since this is where I had the most input (and is most relevant to this blog), I’ll spend my time here.
Being an engineer and contractor, Dave had some ideas right away on how installing a section of flooring could be pulled off logistically and economically. But some of his plans didn’t take into account the needs of a dancer. For example, his original idea was to lay a slick floor on top of plywood, but I interjected with the idea to add a layer of shock-absorbent foam in between to lessen the impact on the girls’ joints. Together, we brainstormed on how to make it all happen. Here’s how it went:
Stupid Wood Jokes
After clearing the basement floor and negotiating terms with the Supreme Leader of the Cave Cricket Clan (in other words, glue traps), we set out for the home improvement stores. We started with three sections of particle board, which may have been the most painful part for Dave because I let my wood jokes fly (“I’m not very PARTICLE-lar to this one.” “WOOD you like to get this one?” “This does KNOT look good to me.” “I usually go against the GRAIN.” “Can you hurry up? I’m BOARD.”). The sheets weren’t the only items we picked up, but those were my best jokes (sadly).

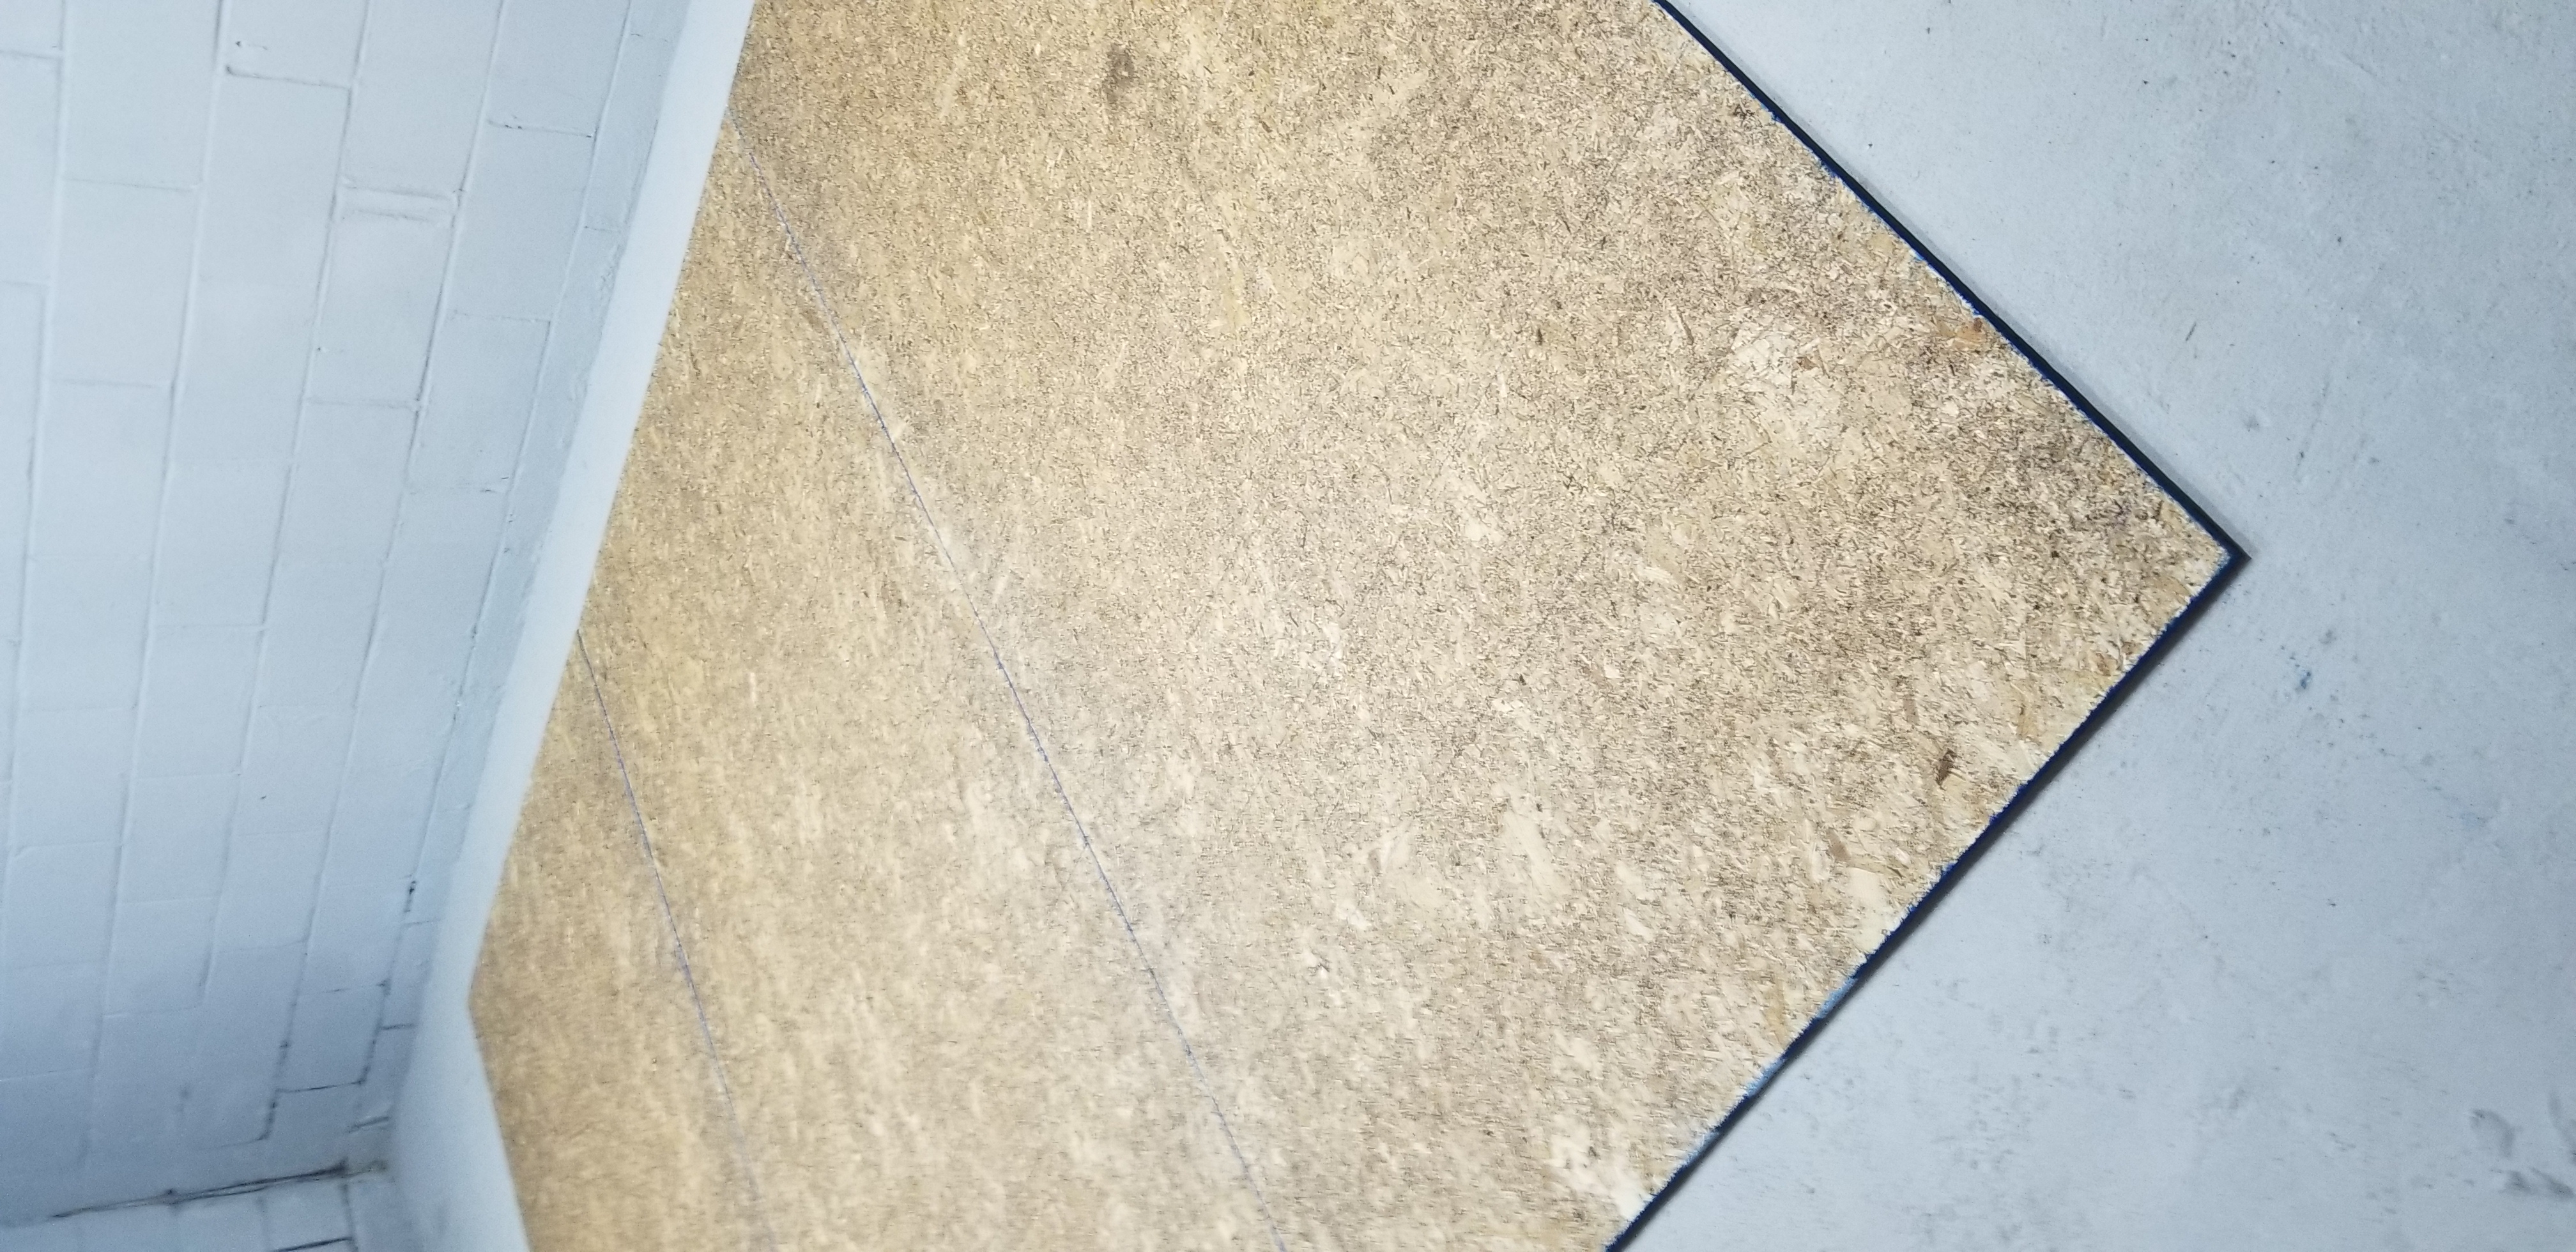
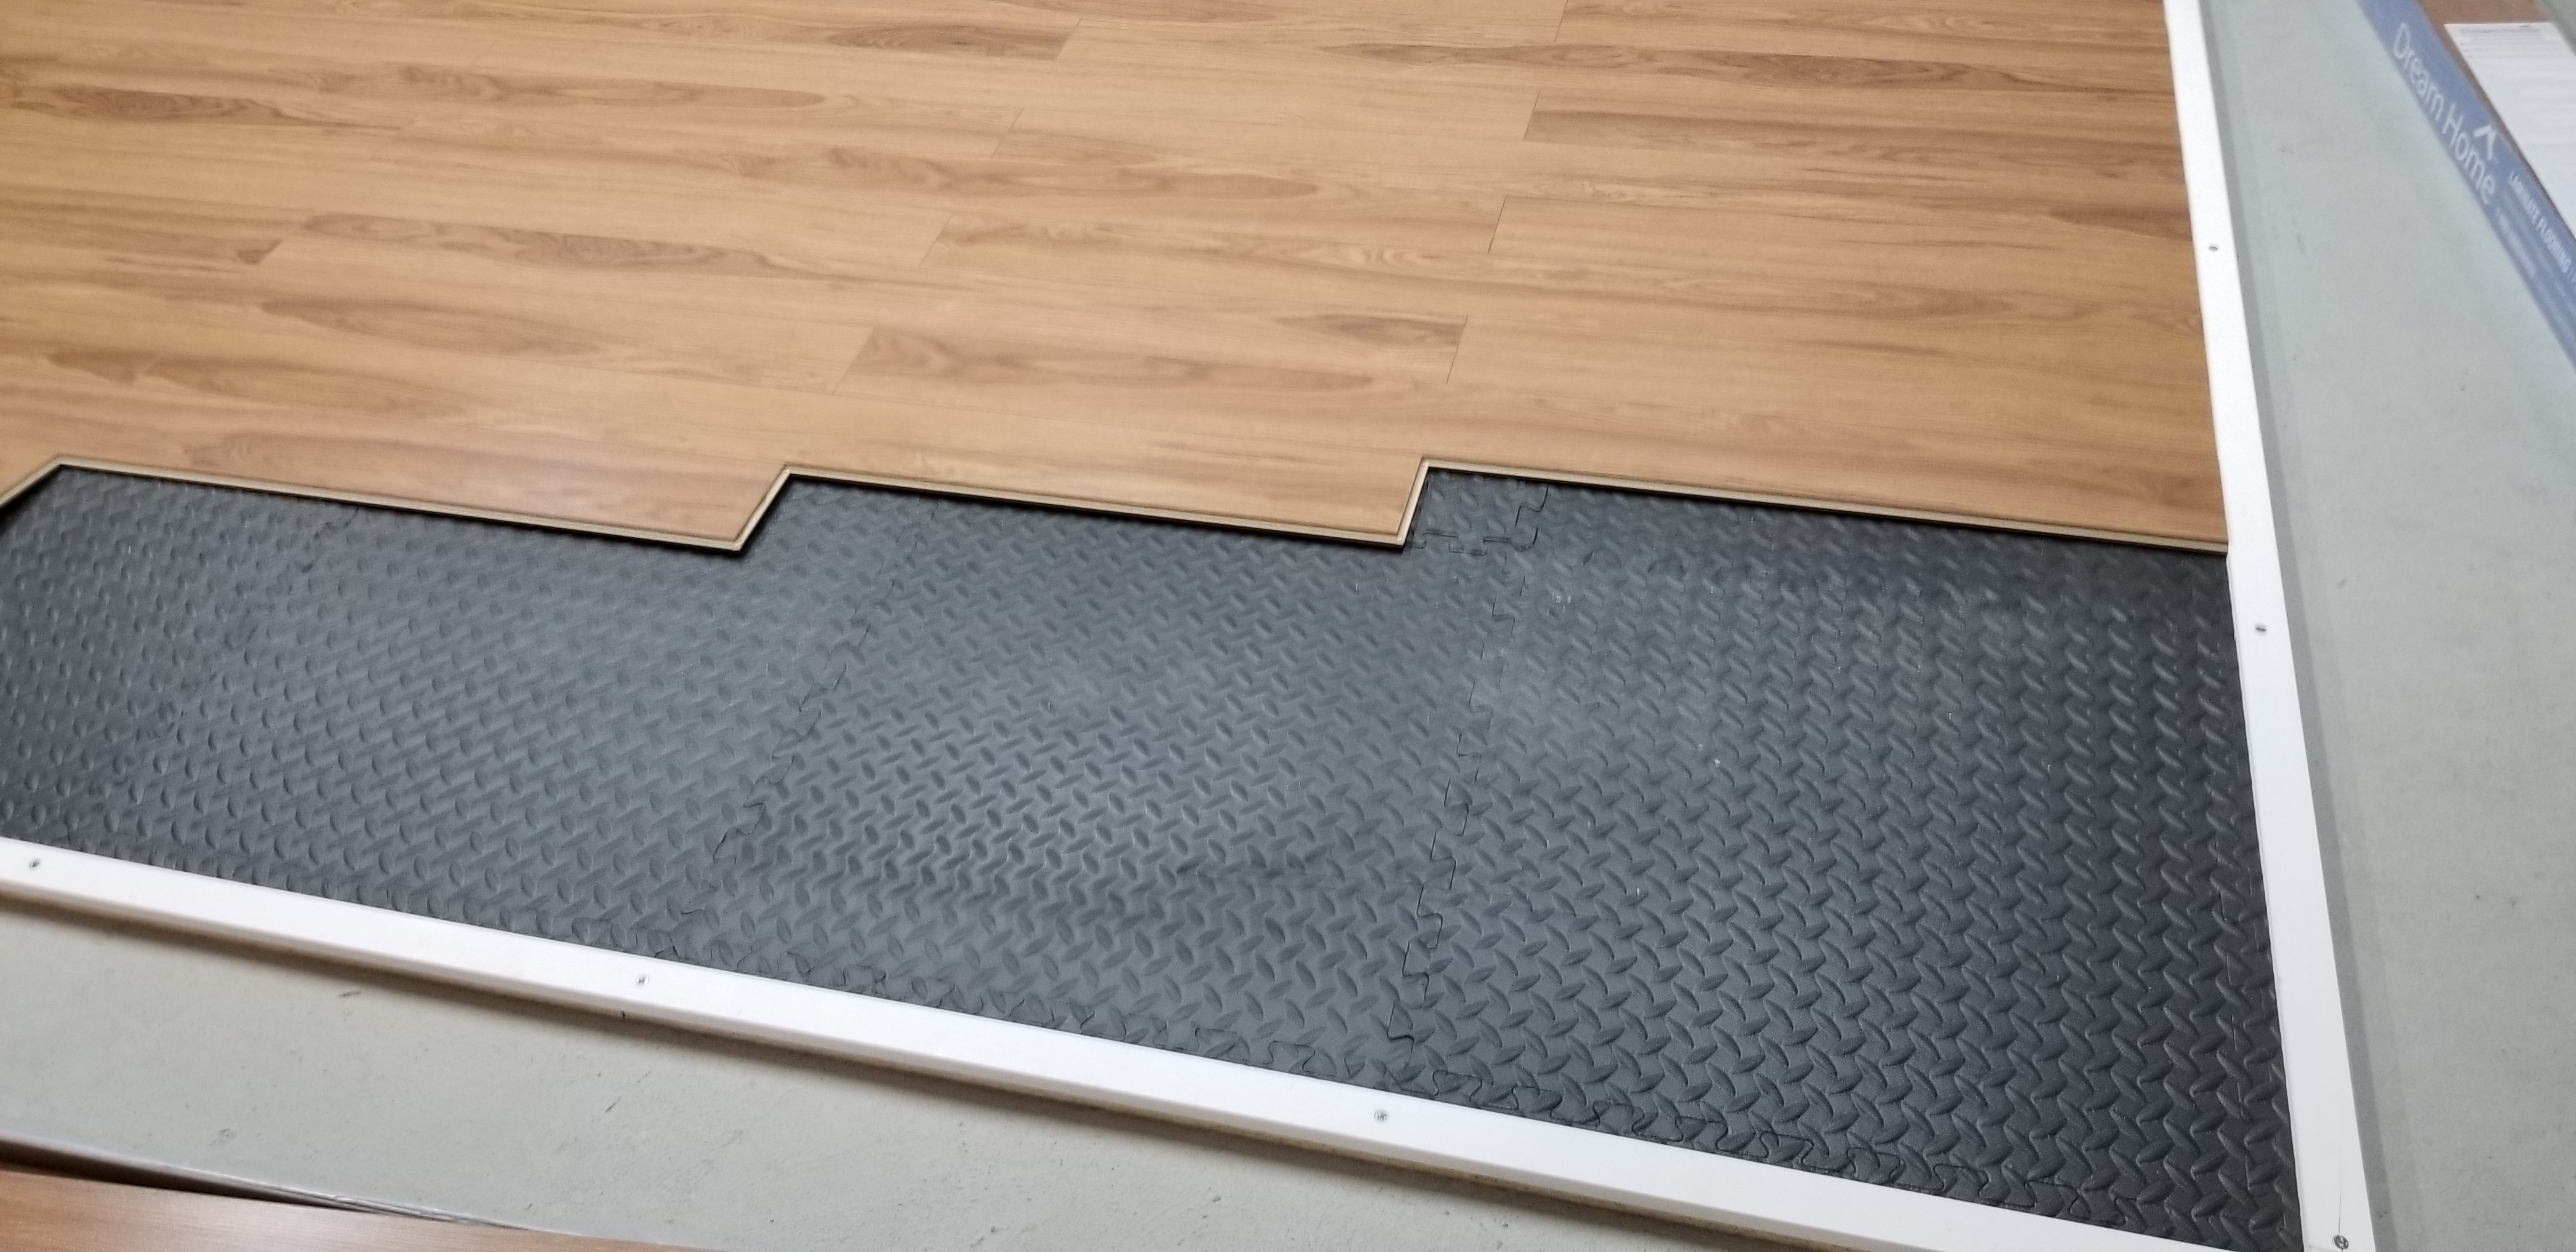
Dave laid the three boards across the basement floor. Knowing the dimensions of the top layers, Dave used a saw to cut off some of the excess (he used a 2×4 to prop the board up on an angle, so he did the cutting right there on the basement floor), and then screwed them into the slab with cement screws (I had explained that it would have to be affixed to the slab because the whole dance floor would move when my girls jumped, leaped, or tumbled on it). Also, it helped to flatten the boards because there was some bowing in them that had developed over time.
No Place Like Foam
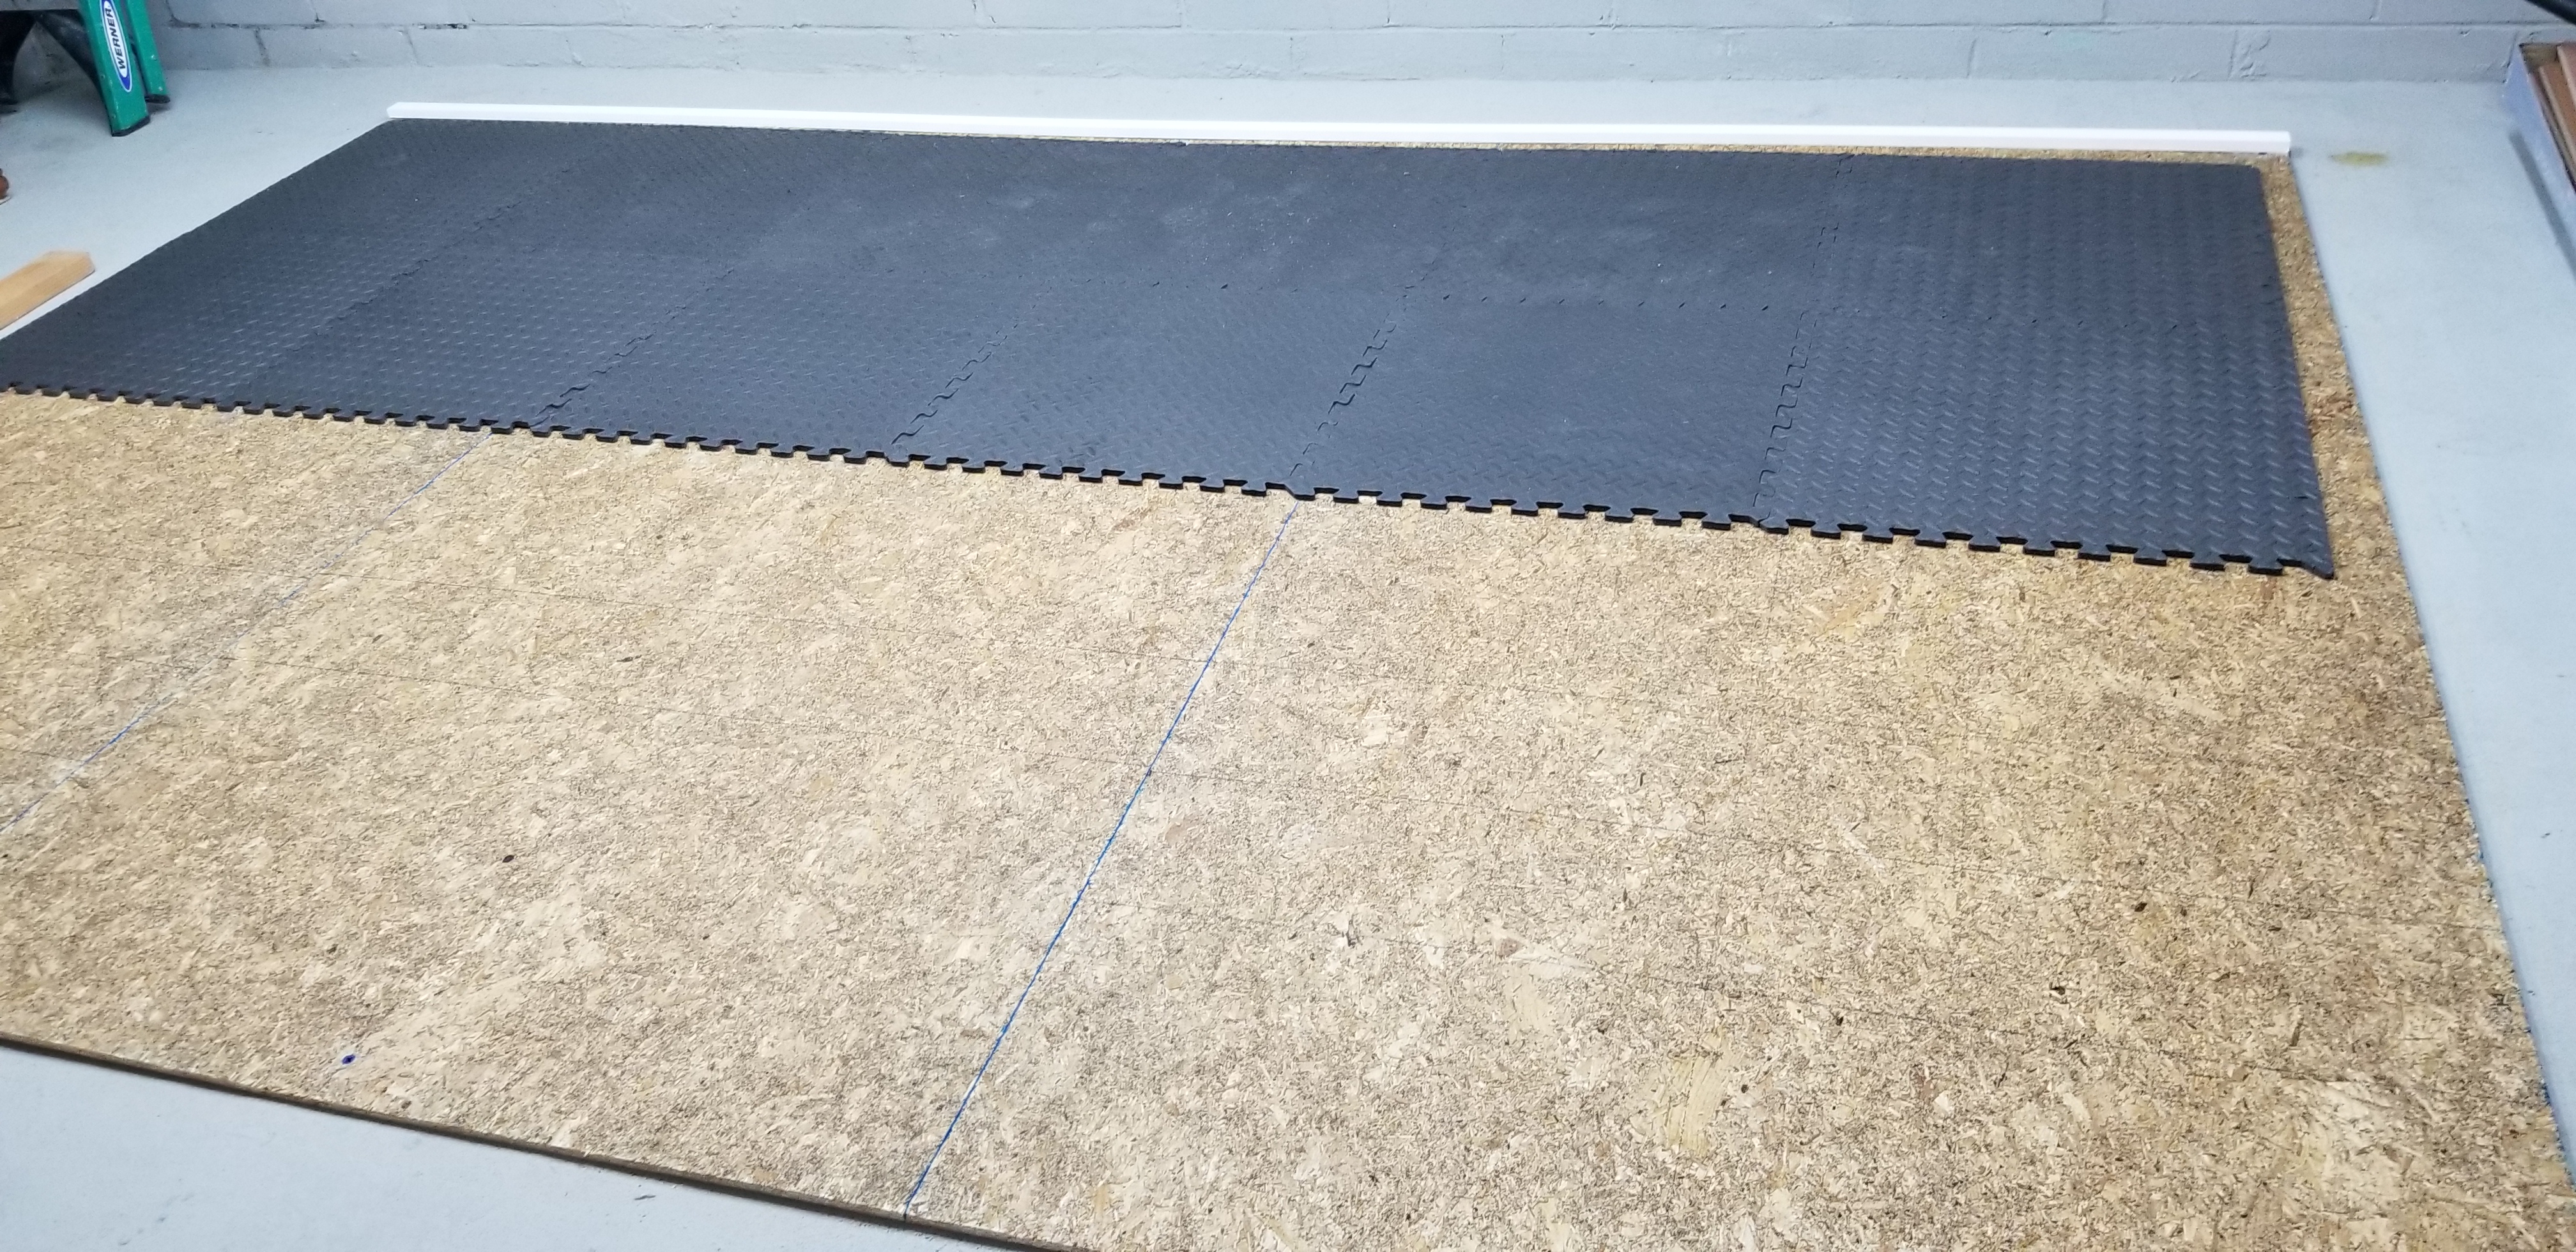
Then I laid out the interlocking foam floor on top of the three particle boards. These were fairly inexpensive, and were shipped quickly from Amazon. Instead of ordering the double-sized set, I ordered two of the smaller sets because the shipping would be quicker (even though it wound up costing me a little bit more dough). Knowing what hard chargers my girls are (they look sweet and innocent, but are bulls in a china shop when they dance), it made sense for the floor to have a bit of “give” so their joints would be better protected.

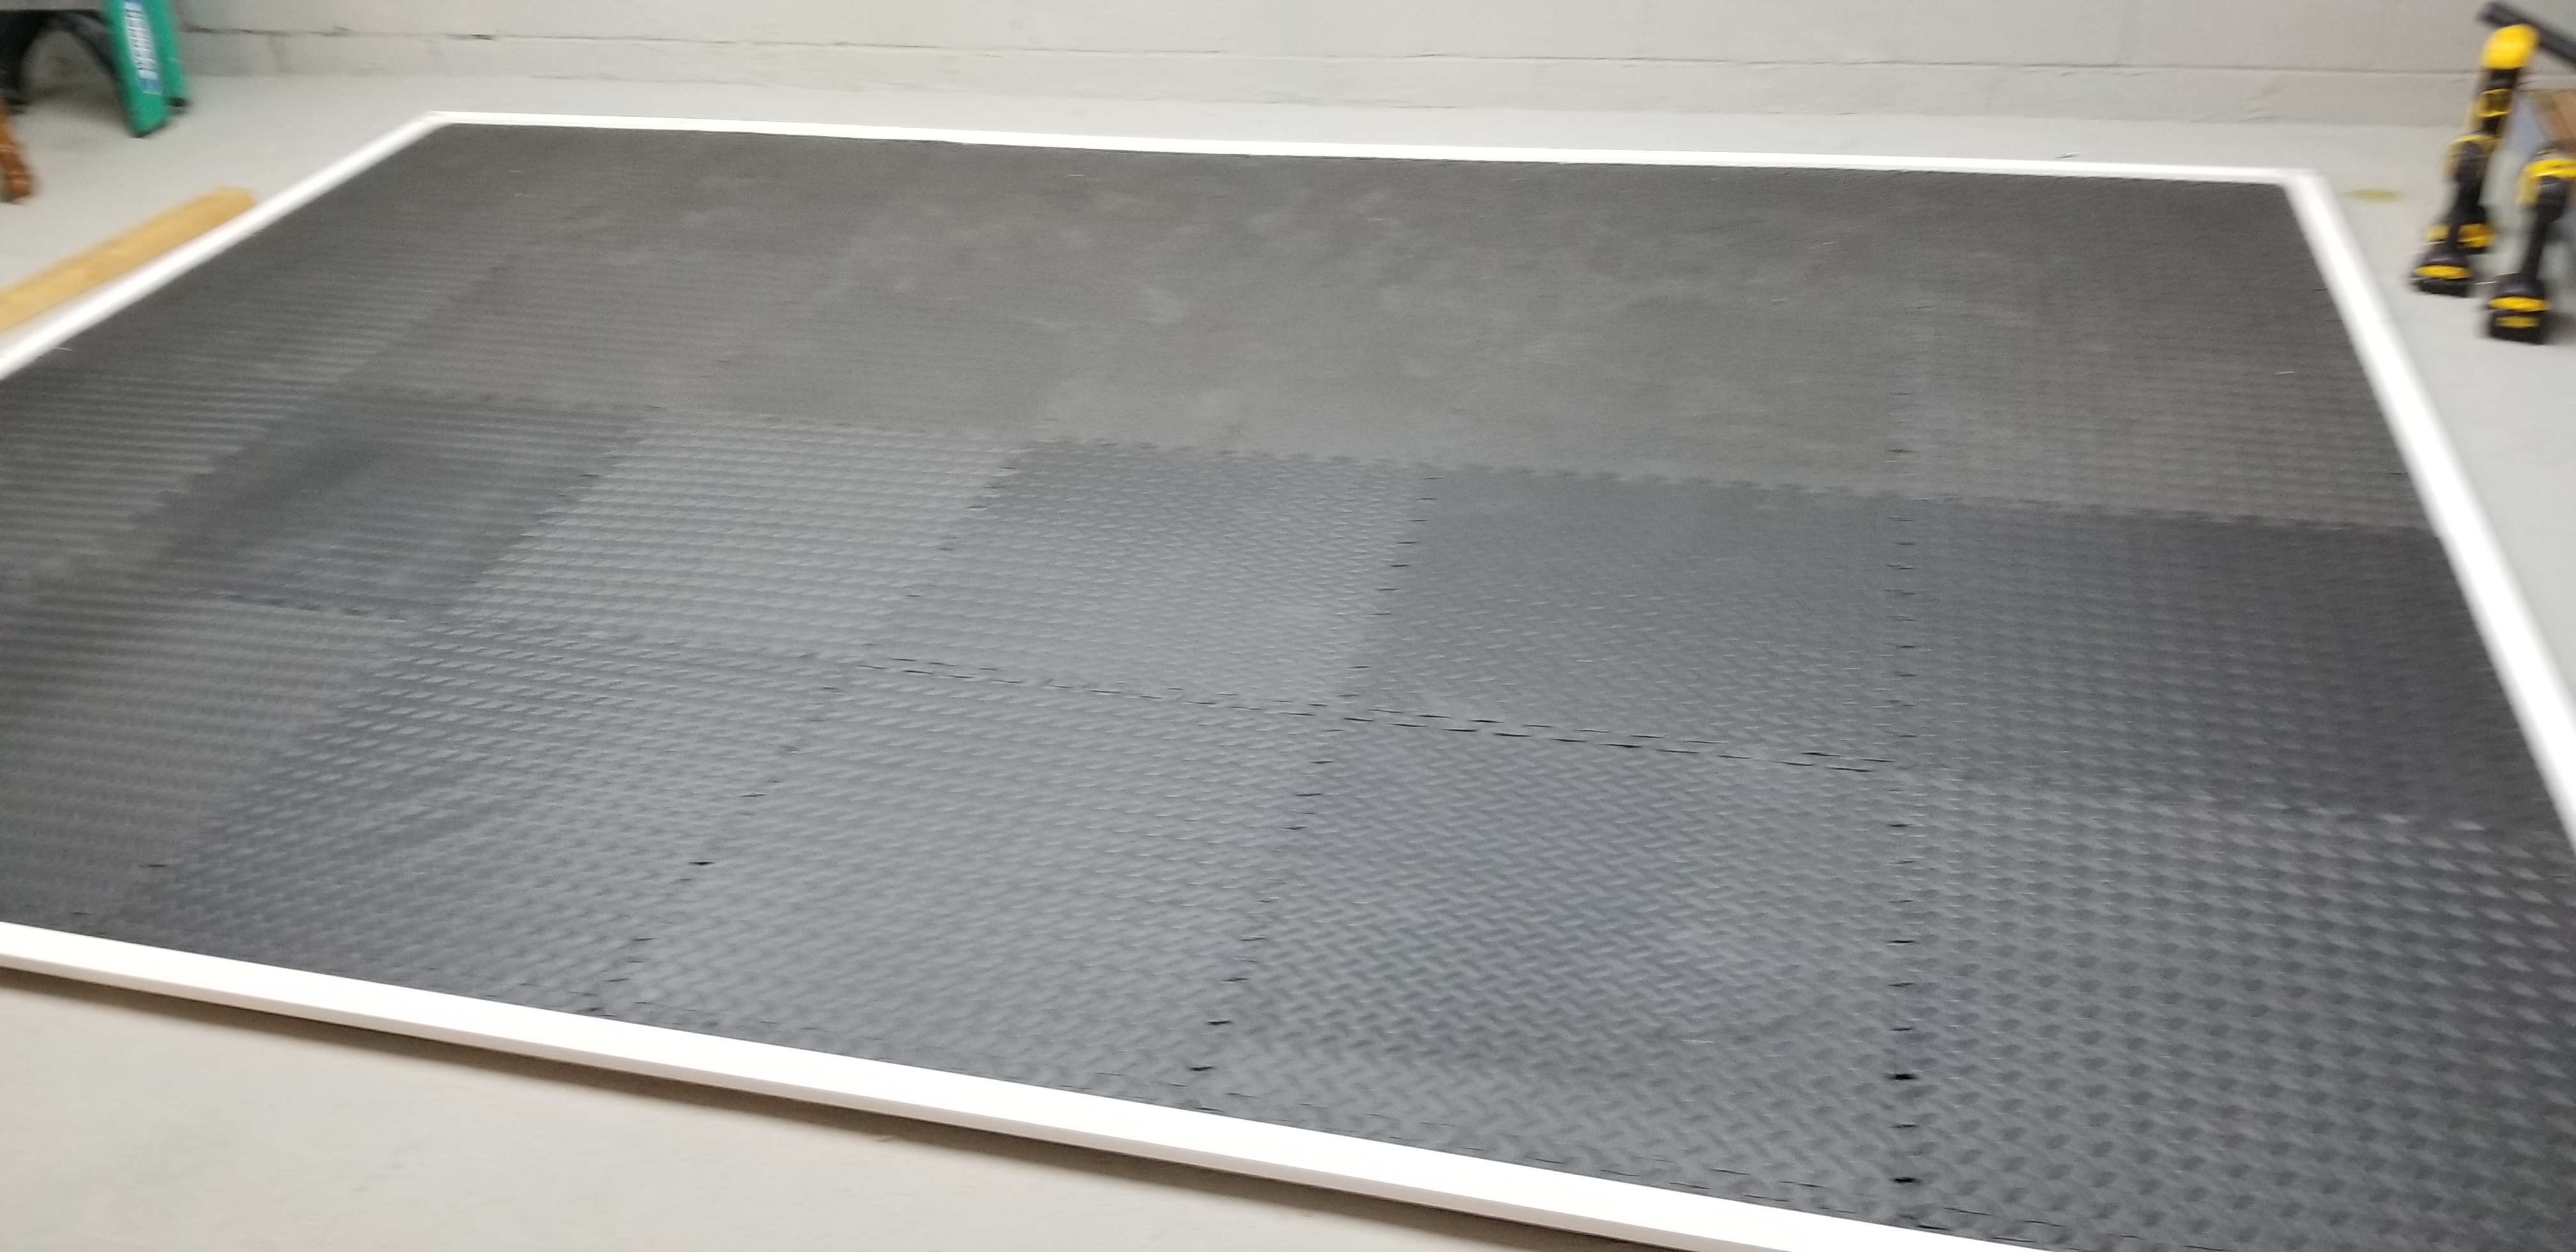
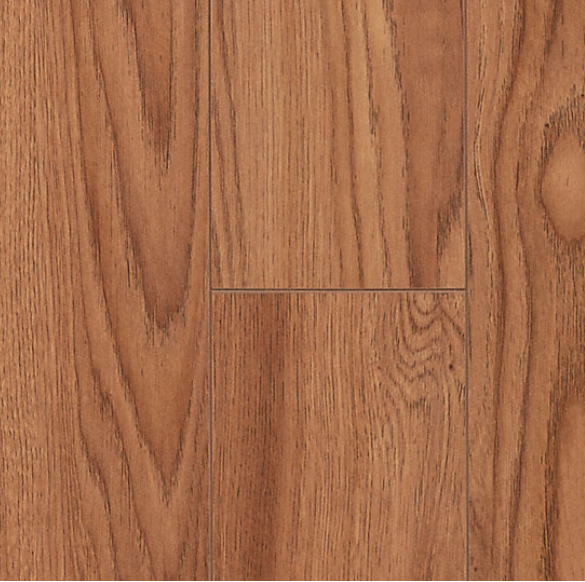
Now it was time to lay the laminate flooring. We had purchased these the previous week from Lumber Liquidators here in NJ because Dave had worked with this exact material before. I’ve seen that many dance families use different flooring types, and really, it’s up to your personal preference. The most time-consuming part was trimming the boards so that they would fit the space and look patterned when they were laid out. They slide and snap into place; some of them took a little convincing, so thankfully Dave knew how to make adjustments so they fit snugly.
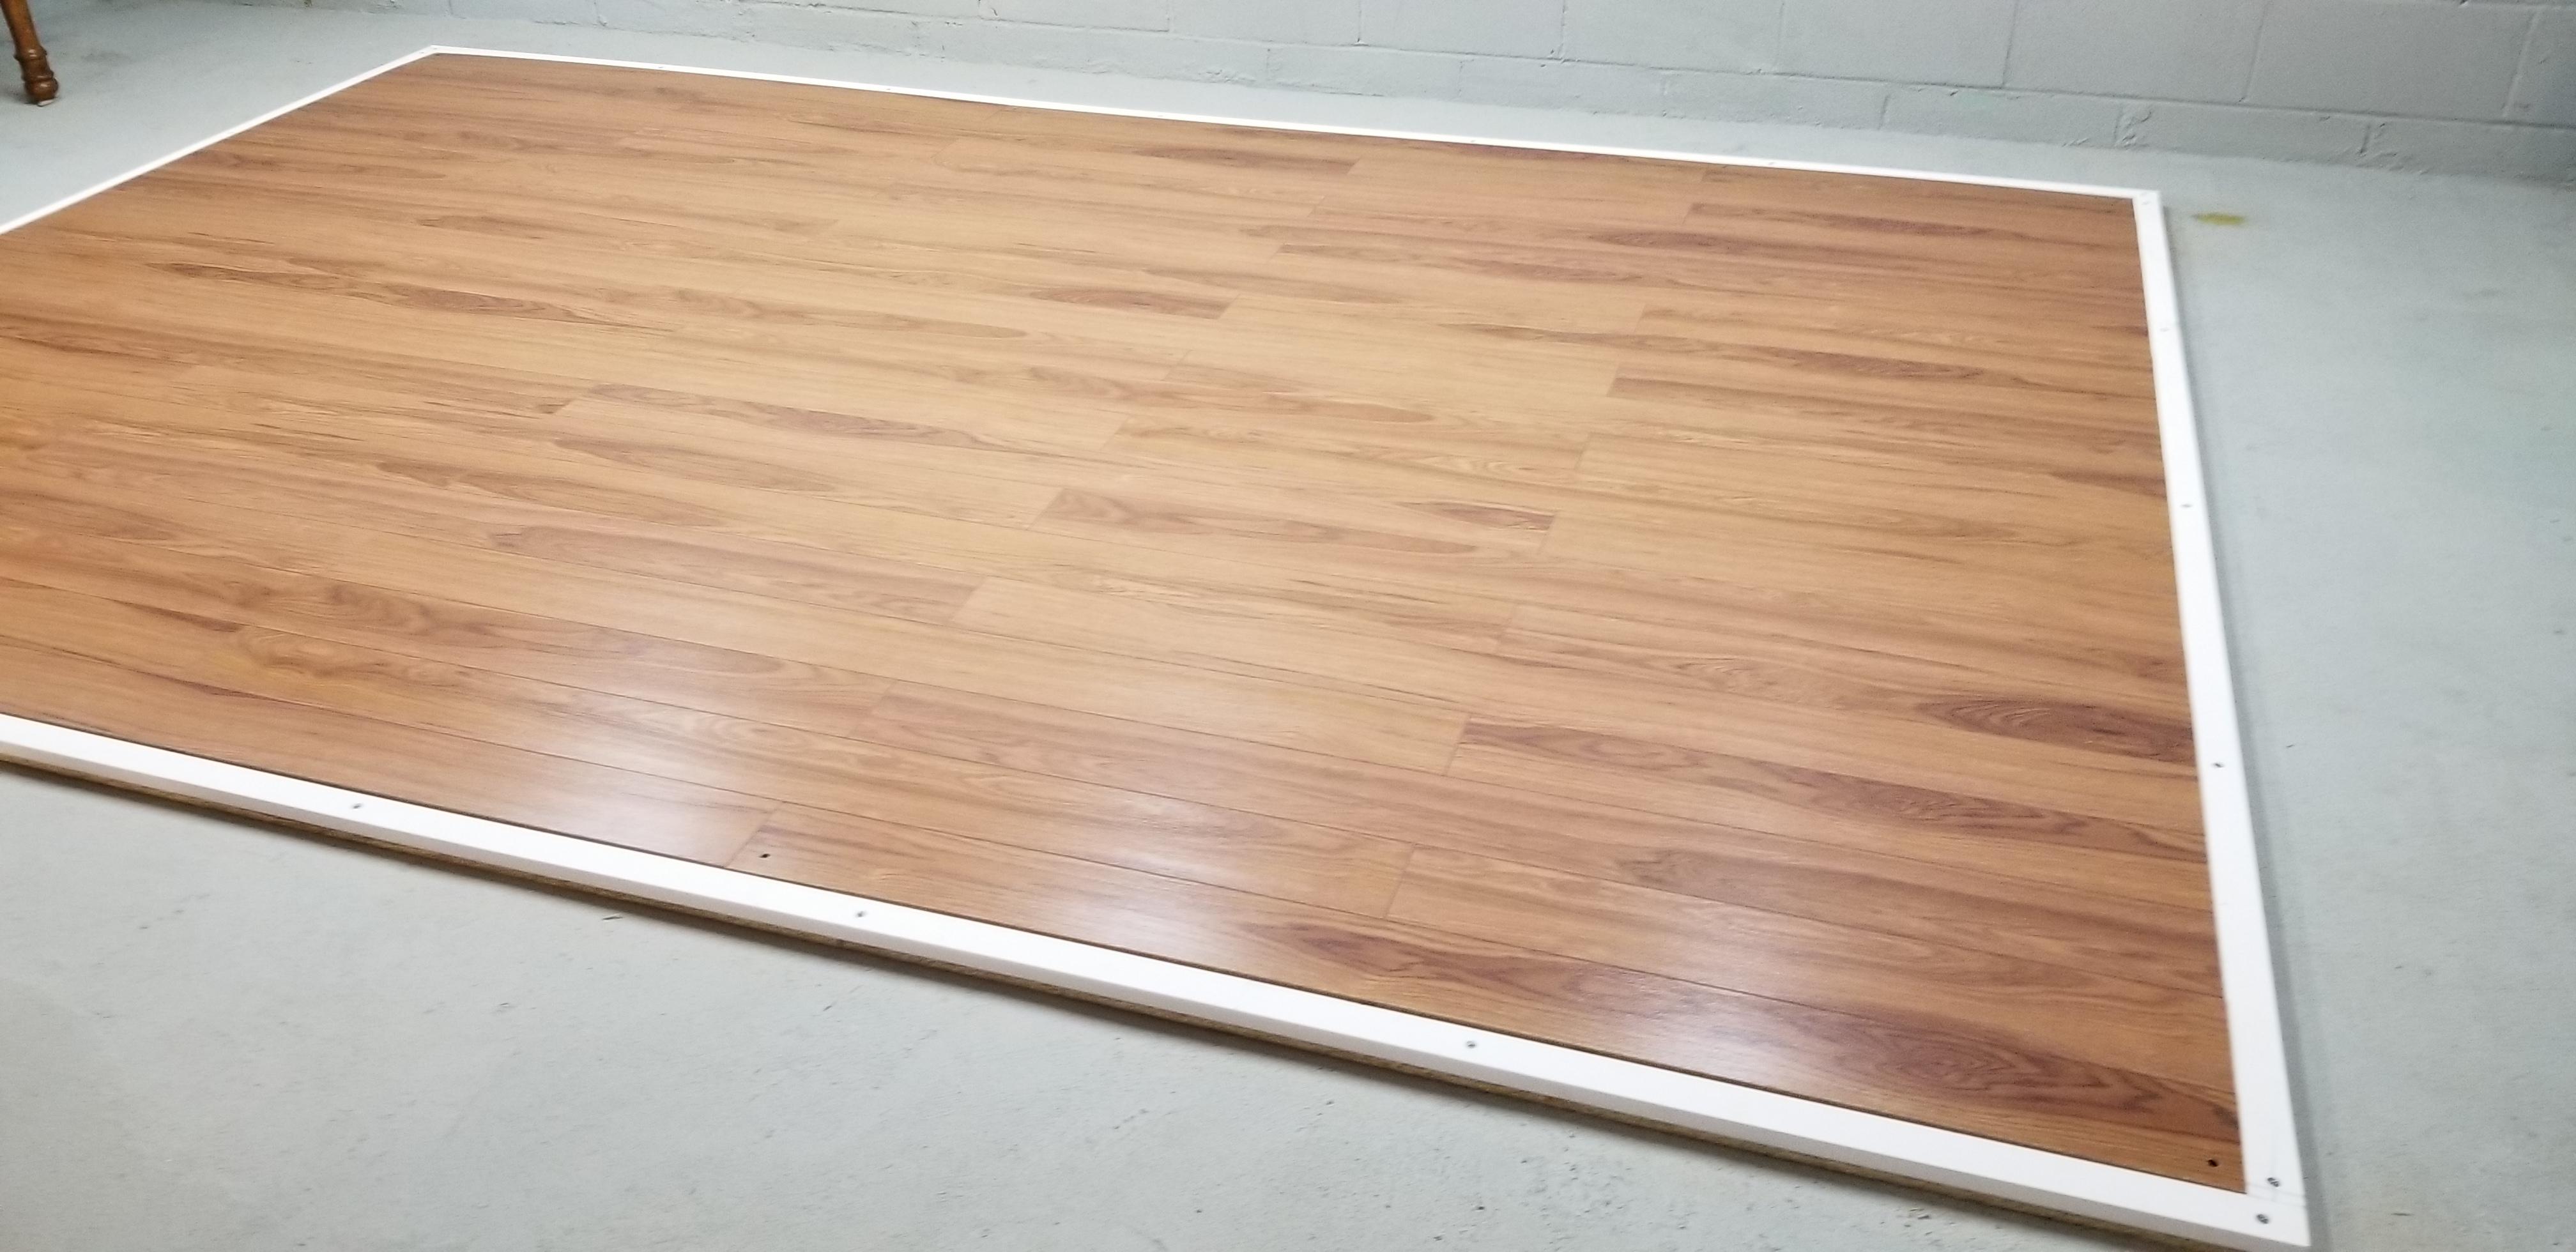
The Finished Product
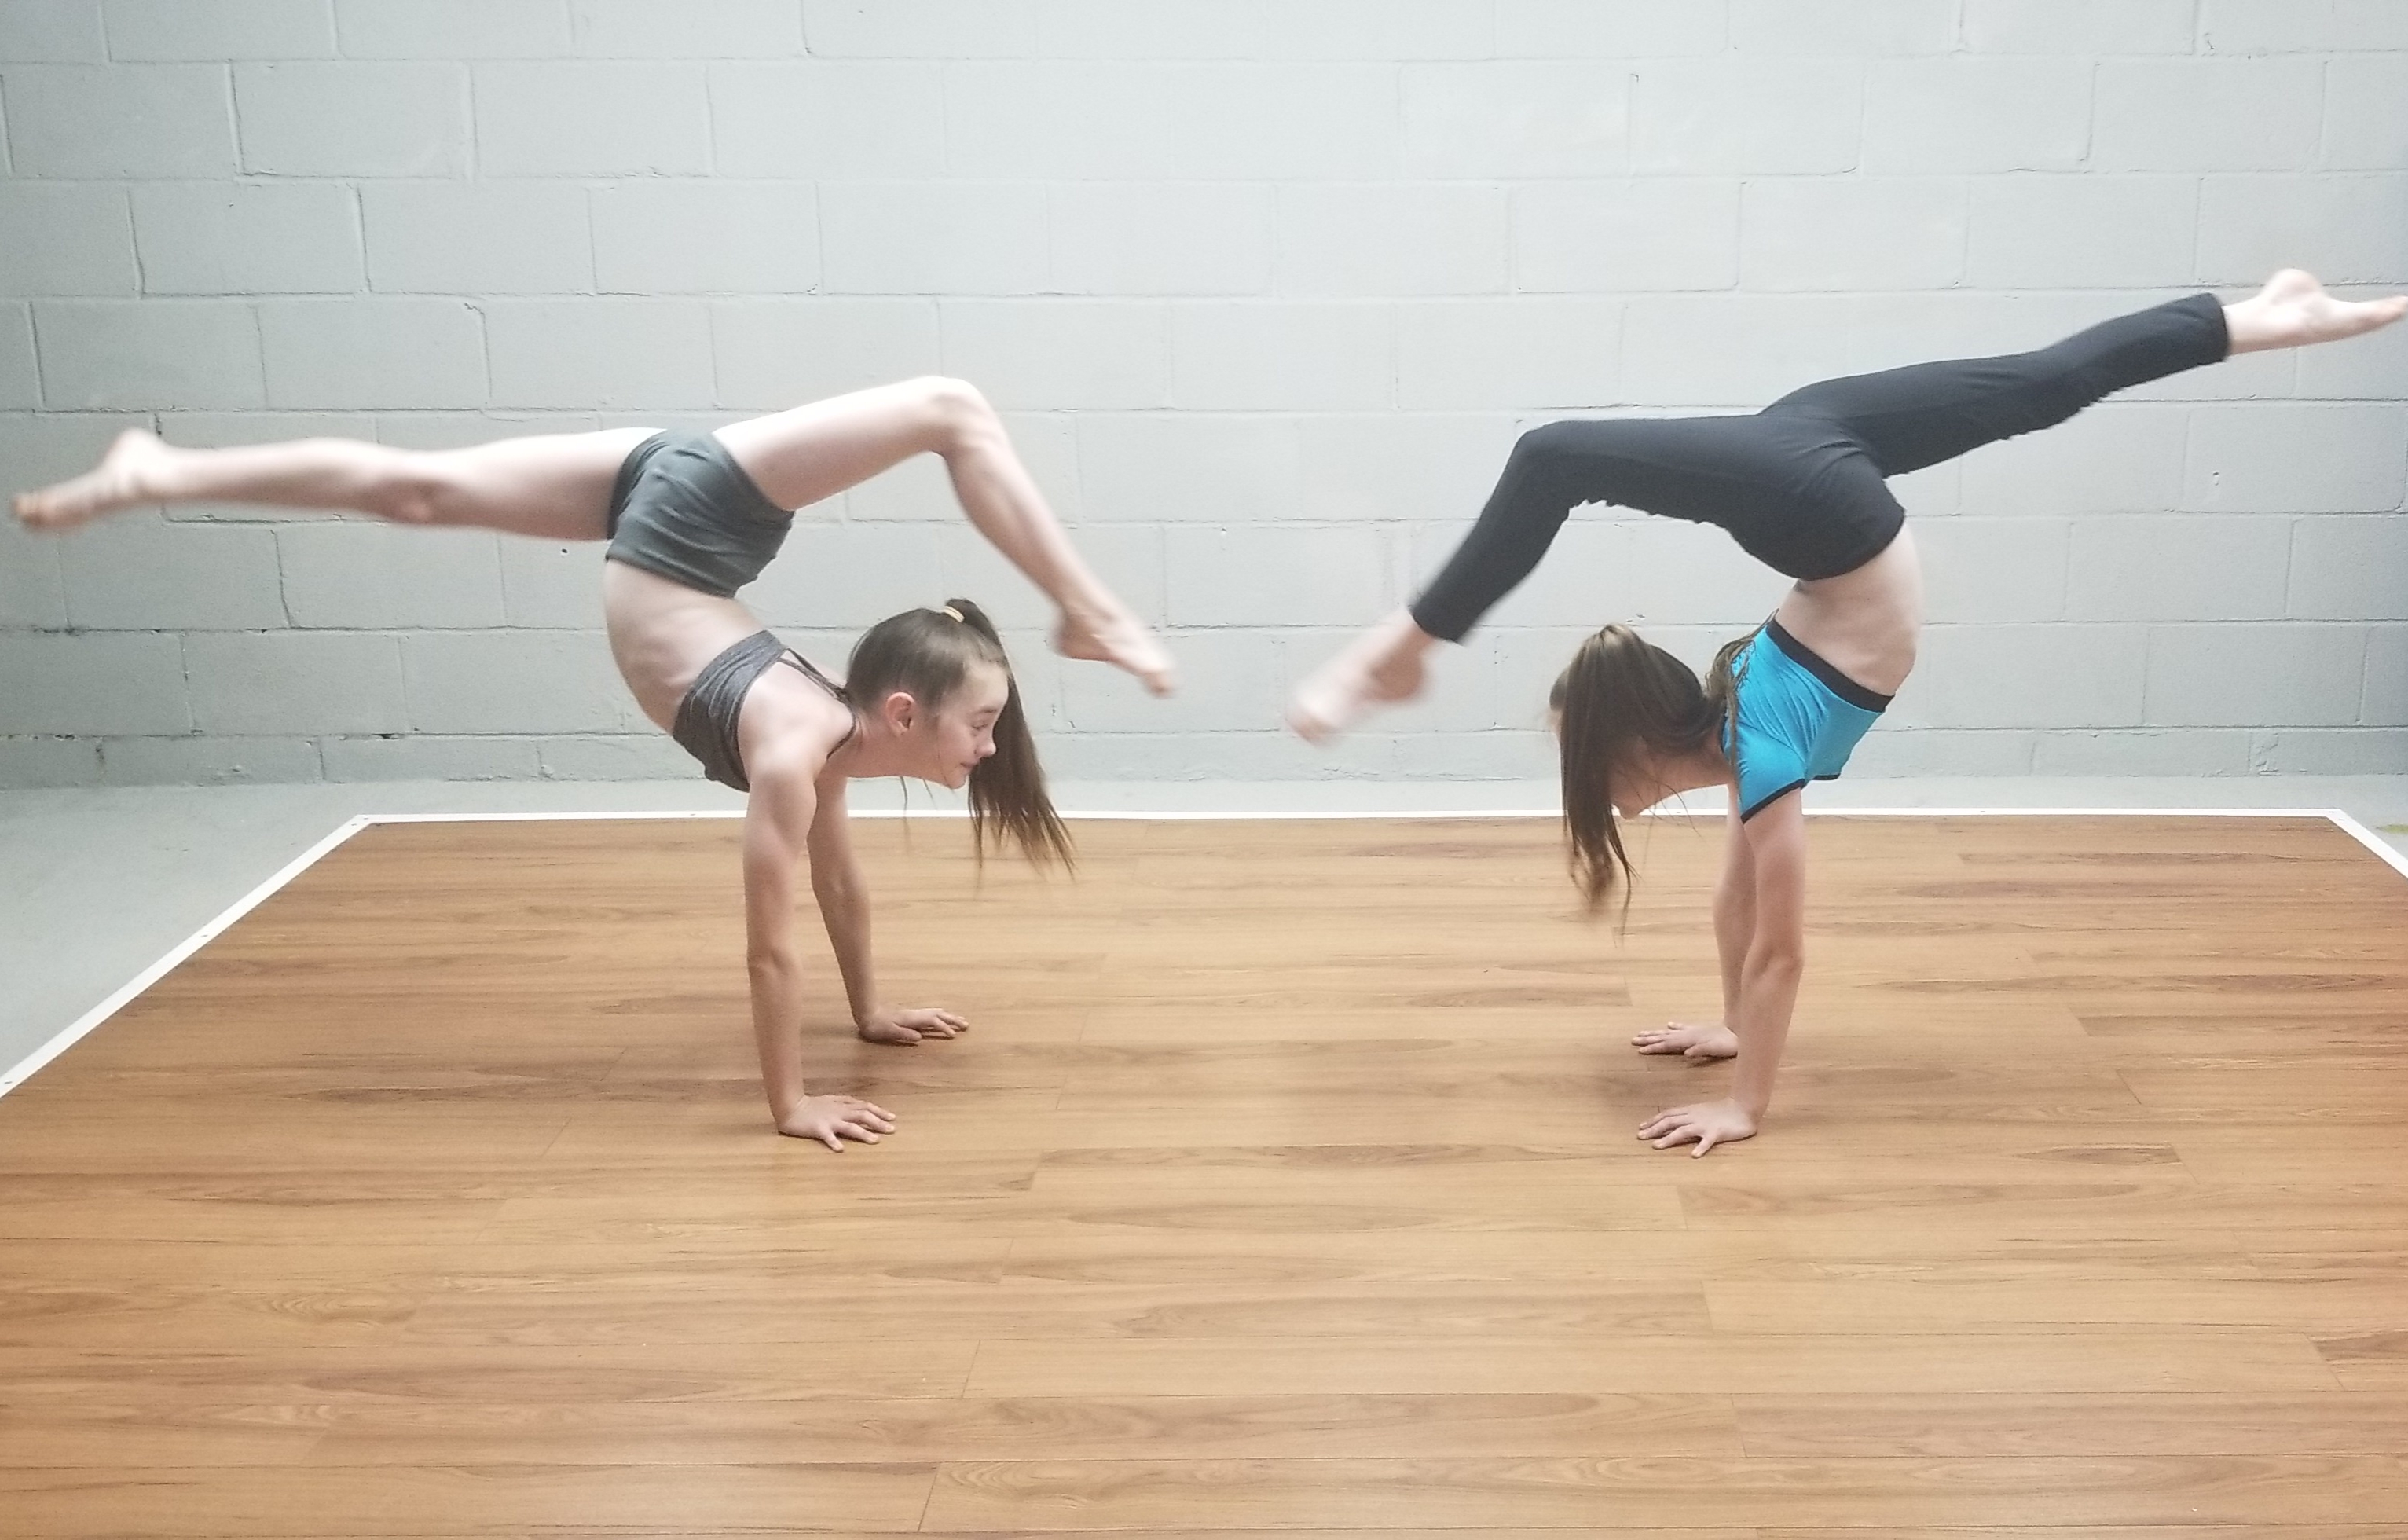
And there you have it! The floor is absolutely great – there is just enough cushion in it to add a little yield, while the floor is slick enough for turns and tap dancing. As we speak, I’m in contact with a mirror company to get a 6′ x 8′ mirror installed on the far wall (the logistics of getting it in will be an issue, as they will probably have to cut it down the center to make it through the doors). I’ll keep you posted on that.
Needless to say, my girls were thrilled! They finally have an indoor space that works for their needs and keeps their at-home dance practice from taking place in the middle of my dining room. I can’t thank Dave from DJC Engineering enough for his hard work and expertise.
Work hard, have fun! – Danielle
This post contains an affiliate link. If you use it to order an item, I may earn a small commission (at no additional cost to you).
This is so cool! It has been so hard with these kids not being able to do their activities.
It really has! Hopefully, this will make it easier for my girls. Thanks for commenting!
Wow that looks awesome! Never thought you could do a little mini version! Now they can practice in the comfort of their own home!
Thank you! He did a fantastic job. Now they have no excuse for not practicing 😉
That is a great floor! Your girls will love it!
Thanks! He worked really hard on it.
That looks amazing!
Thank you! It took a lot of planning and work, but it was worth it.
When my daughter, who is a classically trained dancer, was younger, I thought about building a floating dance floor and installing marley.
We looked into Marley but it would have cost us way more than was in my budget. Having the floor at home has been a blessing. Thanks for weighing in!
That is awesome. Amazing job!
Thank you!
What a great idea! My sister would have loved having something like this at home growing up.
My girls have already begun using it, so it has proven it’s worth pretty quickly. Thanks for commenting!
This is a great project that seems easy en6to have a practice area at home!!
Yes, it makes things SO much easier. Thanks!
Impressive! This is a great time to get home improvements done.
It worked out so well, and helped motivate me to actually clean out the basement (which I should have done over a year ago, lol). Thanks!
What a great solution! High five to you all for getting this accomplished!
Very nice floor and your jokes, while corny, made me laugh out loud!
Lol, thanks! Dave couldn’t wait to get out of Home Depot just so I would have less material (no pun intended, I swear) to work with!
This looks like a project my husband can manage. My daughter is missing dance, too!
Dave is a planner and laid out all of the details before we started, which is why it went so smoothly (in my non-engineering opinion, lol). Thank you!
What a great idea. The final project looks beautiful.
Thank you! We’re really happy with how it turned out.
What a great idea! If only we had a bigger house 🙁 My girls would love this.
I downsized dramatically from my previous house, so I was lucky that our new place had a basement to be able to do this.
What a fun project. I’m sure that was a dream come true for the girls.
Thanks, they were thrilled!
This looks so cool! and was done so quickly, thats awesome that your girls have a dance floor at home to practice.
Thank you! I was so glad that one of us (spoiler alert: not me) knew what he was doing, lol.
What a cool idea! I’m glad they have such a wonderful place to practice. The mats underneath are also a great idea. I kind of wish I had that under the laminate flooring in my dining area!
I am really happy with the way the mats give that little bit of cushioning, and was fairly inexpensive. Thanks for weighing in!
This is amazing! I danced my entire life growing up and I used to have to practice in our backyard because we didn’t have the space inside for me to practice. So this is amazing that you are able to do this for them! Very neat!
Thank you! Dance is great, isn’t it?
That’s amazing. Teamwork makes the dream work!
Thank you! I couldn’t have done it without a little help, lol.
Well done! What a great use of space!
Thank you! Before this, it was a storage locker for all the nonsense I wouldn’t let go over the years, lol.
That’s awesome!! I’m sure the girls love having at outlet for their energy and a place to practice, right in the comfort of their home! Nice job!
Thanks so much! Yes, they need an outlet for their boundless energy – they were driving me nuts when they had to practice in the dining room, lol.
Very creative! We would have never thought about a mini-dance floor!!
Thank you! My girls were driving me crazy with their dining room tap rehearsals, lol.
What a great DIY! I’m sure the girls are enjoying it to its fullest!
Yes, they are! They’ve brought pillows and blankets down there and set up a cot to take breaks on, lol. Thank you!
Nice job!
Thank you!
Such a great idea for dancers! And didn’t look too difficult to put in either.
It was fairly do-able because I had someone that knew what they were doing, lol. Thanks!
Such a great idea!!! I’m sure the kids love it and are practing ALL the time.
Yes, the girls have started to hang out down there in addition to practicing so it was time and money well spent. Thanks!
This dance floor looks amazing! Bet they are enjoying it.
Yes, they love it and it came in VERY handy during our virtual recital last week. Thanks!
What a great idea! So impressed – I am sure they are loving it!
Thank you! They’ve been using it pretty regularly already.
Waterproof vinyl flooring is luxury engineered vinyl that is 100% waterproof. Designed with a waterproof, durable core, waterproof vinyl flooring is the highest quality vinyl flooring out there Depending on the composition of waterproof vinyl flooring, it will be called WPC or SPC. WPC stands for wood plastic composite, and is made from a mixture of plastic and wood flour. SPC is a stone plastic composite, and it’s composed of plastic and – you guessed it – stone! WPC has been around for a few years, but SPC is pretty new to the flooring scene. Both options are completely waterproof. So let’s get into how that works. Waterproof vinyl flooring typically features a four-layer construction that includes a waterproof core. This core is what sets this luxury vinyl apart from the rest. Many waterproof vinyl flooring options feature a backing layer or an attached underlayment in cork or foam. This serves two purposes: first, you won’t have to buy additional underlayment, and second, it provides softness and sound absorption to your floor. If you’ve ever walked on a floor without underlayment, you know it tends to have a hollow sound when stepped on. The attached backing prevents this. As a bonus, now you don’t have to spend extra money buying underlayment and installing it before installing your new vinyl.
Hi Danielle! My apologies, I just found your post and it is now over 4 years since you posted this, so I’m hoping there’s some way that you’ll see this comment. What a nice dance floor and so fun to read your funny comments along the way!
Your post is titled “How we built a dance floor in one weekend on a shoestring budget” but you don’t give any details on the cost so that one can compare. I know the main 3 items can be researched, but there are other items too, like what is that white frame, and how much was that? Screws and other items too that are essential? Even though things are more expensive now that it’s 2025, I could still use some prices from you so that I can compare with other options. Maybe in 2025 it’s too expensive to diy this, or maybe it’s cheaper (wouldn’t that be nice!).
FYI, I’m helping a friend who needs a dance floor to teach in her home.
Thank you for any help.
You have a lovely family too!
Peace and blessings,
Linda